Watercolor sticks are delightful — compact, portable, and full of potential. In her video demonstration (linked below), artist Sandy Allnock showcases 8 inventive ways (plus one bonus tip!) to use our watercolor sticks to their fullest — from sketchy textures to fluid washes. We want to share those techniques, so you can try them out yourself and see how they expand your creative toolbox!

Below are Sandy’s methods, each with a “how-to” and a few pointers. Whether you’re a sketcher, plein air painter, or studio artist, you’ll find something new you can try — even combining techniques in the same artwork.
Watch Sandy in Action
Let’s dive in — here are 8 (plus a bonus!) ways Sandy uses watercolor sticks, followed by some pro tips and project ideas you can try right away.


Use the watercolor stick like a crayon or pencil directly on dry paper.
This creates textured, sketchy marks that can be softened with a damp brush afterward.
Perfect for expressive line work or quick plein-air sketches. Sandy suggests that this technique would be great to achieve perfect tree bark texture!
Color used: Pyrrol Orange

Tip: Lightly misting the paper first can help pigment dissolve more easily when you add water.

Just like we always say, it’s like a pan in your hand!” Load your brush with water, then touch it to the end or side of the stick to pick up pigment.
You can paint directly from the stick this way — ideal for quick color pickup in the field. Instant pigment load!
Color used: New Gamboge

Tip: More water in your brush brush creates lighter color; less water gives you thicker, more intense pigment.

Create a small puddle of clean water on your palette or paper, then swirl the watercolor stick in the puddle.
The pigment will release into the water, forming a rich pool of color you can paint from.

Tip: This is a great way to loosen pigment quickly or pre-mix blends before applying to paper.

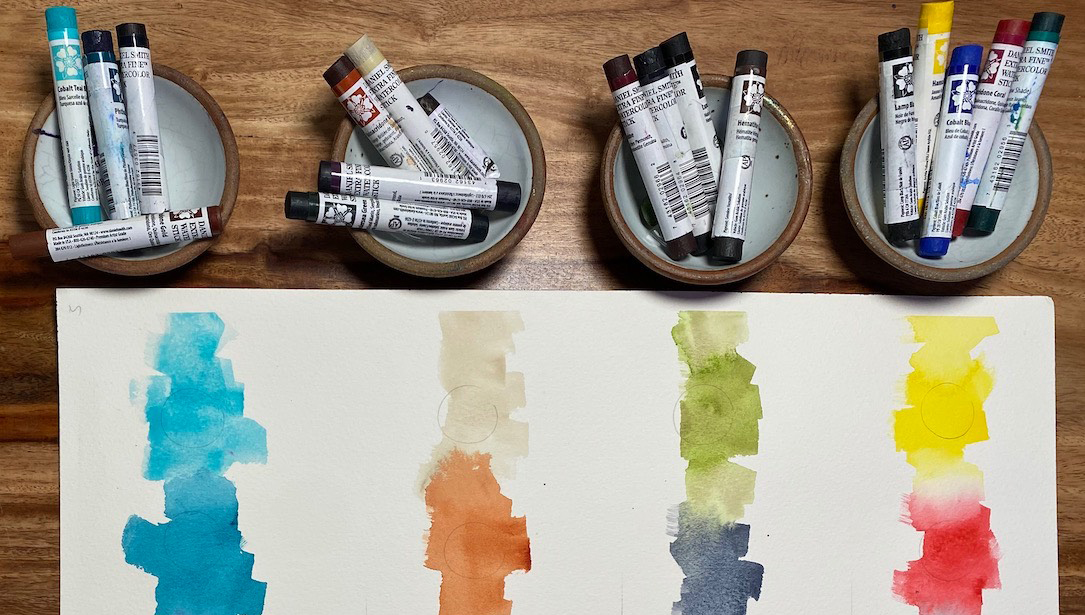
Swirl one stick’s pigment into another’s puddle — or mix a watercolor stick with tube or pan color. Here we made a unique granulating green by adding Cobalt Teal Blue to our puddle of New Gamboge!

This technique expands your palette, allowing you to create custom hues or subtle shifts in tone.
Tip: Mixing complementary colors helps tone down intensity or create natural neutrals. Try mixing purple + yellow or even orange + blue to see what neutrals and browns you can create!


To darken a hue, add more pigment from the stick into your water or mix.
The more pigment you introduce, the deeper and more opaque your color becomes.

Tip: Test your values on scrap paper to see how much pigment you need for your light, mid, and dark tones.

Cut off a small piece of a watercolor stick and press it into an empty pan or palette well.
Add a drop of water so it adheres, and you now have a compact, portable version of your favorite color.
Tip: Once dried, the stick behaves just like pan watercolor — simply rewet to activate.


Use a knife or scissors to shave off small bits of the stick and drop them into water or onto your palette.
They dissolve into paint quickly and give you fine control over how much pigment you use.
Color used: Cerulean Blue, Chromium

Tip: Keep the leftover stick wrapped in its label for easy identification and less mess.

Use a craft knife or pencil sharpener to create a fine point on your stick.
This gives you pencil-like control for adding details or fine lines.
Tip: Save the pigment shavings — you can use them just like in the previous method to make instant watercolor.
Color used: Cerulean Blue, Chromium

While your painting is still wet, drag the watercolor stick through the wet area.
The pigment deposits differently, leaving soft, diffused lines that merge beautifully into the wash. Here we used New Gamboge in a wash of Cerulean Blue, Chromium.
Tip: This “wet-into-wet” stick drawing is perfect for textures such as tree bark, grasses, or reflections on water.

These techniques can be used individually or combined in a single piece — for example, sketch with a dry stick, dissolve color into a wash, then draw back into it while still wet.
Experiment to see how each method feels, and note which ones suit your own painting style best!

Sandy Allnock explores many mediums in her art and classes and insists on using high quality materials to achieve the results she envisions. Artists deserve good supplies – learning with lesser materials only lengthens the learning curve! Over two decades ago, Sandy’s long and successful graphic design career gave way to her childhood dream of becoming a full-time artist and instructor. She’s now creating everything from landscapes to urban sketches, abstracts to hyper realism, trains to butterflies, galaxies to oceans—any subject may find its way to paper through her brushwork. One of her greatest joys is watching her students take on new challenges, stretch, and grow—because it inspires her to do the same.