Share:
When I create studies in my journal of my favorite flowers and plants, I look to artists of the past for inspiration. In the West, the German Renaissance painter Albrecht Dürer was the first artist to turn his attention to nature with his studies of turf, a hare and a stag beetle. He marked an important shift in Western art, when artists began to look at the world around them with the same type of scrutiny that early natural scientists were applying to their studies. This radical new approach to the natural world developed as unusual flora and fauna from the New World were imported. These amazing plants and animals did not fit into the old categories, and in some ways helped to propel the revolution in science.
In our modern gardens with the enormous variety of plants available to us, we can feel some of the same thrill that artists and scientists experienced as they saw remarkable plants for the first time. And that is the feeling that I try to bring to my journal entries – that I am seeing the studied plant for the first time and I am filled with wonder and excitement. Thus, I don’t always do a very tight rendering. I like to have a sense of movement and grace in my painting, and I don’t always add every detail. I’m trying to capture how the plant looks as my eye first roves over it, stopping here and there, but not yet focusing.
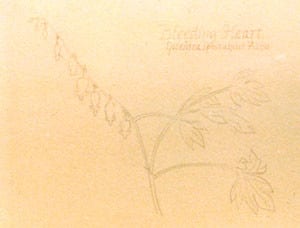
STEP 1 – Sketch
I use a 2H pencil for the initial sketch, which I often do outdoors, even in winter. Sometimes I cut the flower or foliage and bring it indoors to work with in my studio. My sketch remains only a contour drawing, without any indication of light and dark. If I’m going to be painting later, I make notes about the direction of light.

STEP 2 – Mask
Apply DANIEL SMITH Masking Fluid to stems and flower shapes. Use the special nibs that come with the Masking Fluid where a finer line is required.

STEP 3 – Wash
After wetting the entire page around the masked shapes, drop in a mixture of Cadmium Yellow Medium Hue and Hooker’s Green. You may choose to cool and neutralize this mixture with a little French Ultramarine and Burnt Umber. Then mix Hooker’s Green, French Ultramarine Blue and Burnt Umber in a heavy saturation. While the lighter wash is still wet, drop in this more saturated mixture next to the flowers and stems.
If I use just the tip of the brush to pick up the more saturated mixture, it’s easier to avoid the back runs that can result from having a brush too heavily loaded.
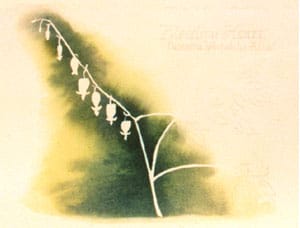
STEP 4 – Remove Masking
After the wash has dried, remove the Masking Fluid with a rubber cement pick-up.
STEP 5 – Stems and Leaves
Paint stems and leaves with a mixture of Cadmium Yellow Medium Hue and Hooker’s Green. While the wash is still wet, create shaded areas with the same mixture to which you’ve added French Ultramarine Blue and a little Burnt Umber. The saturation should be more intense for this mixture.
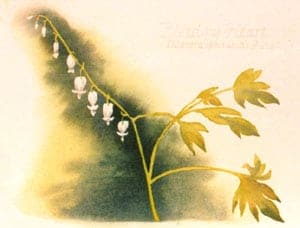
STEP 6 – Flowers
Model the forms of the flowers by painting a gray wash in shadowed areas. Use a mixture of French Ultramarine Blue and Burnt Umber.
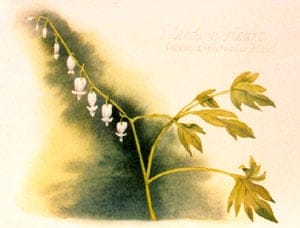
STEP 7 – Details
Add the veins on the leaves, using a small rigger brush or your smallest round brush. The saturation should be more intense than the one used for the shaded areas in the leaves.

STEP 8 – Name
Naming the plant gives the journal entry the look of a botanical illustration. You can dilute DANIEL SMITH Walnut Ink with distilled water to get a paler appearance, which often looks better with watercolor.


