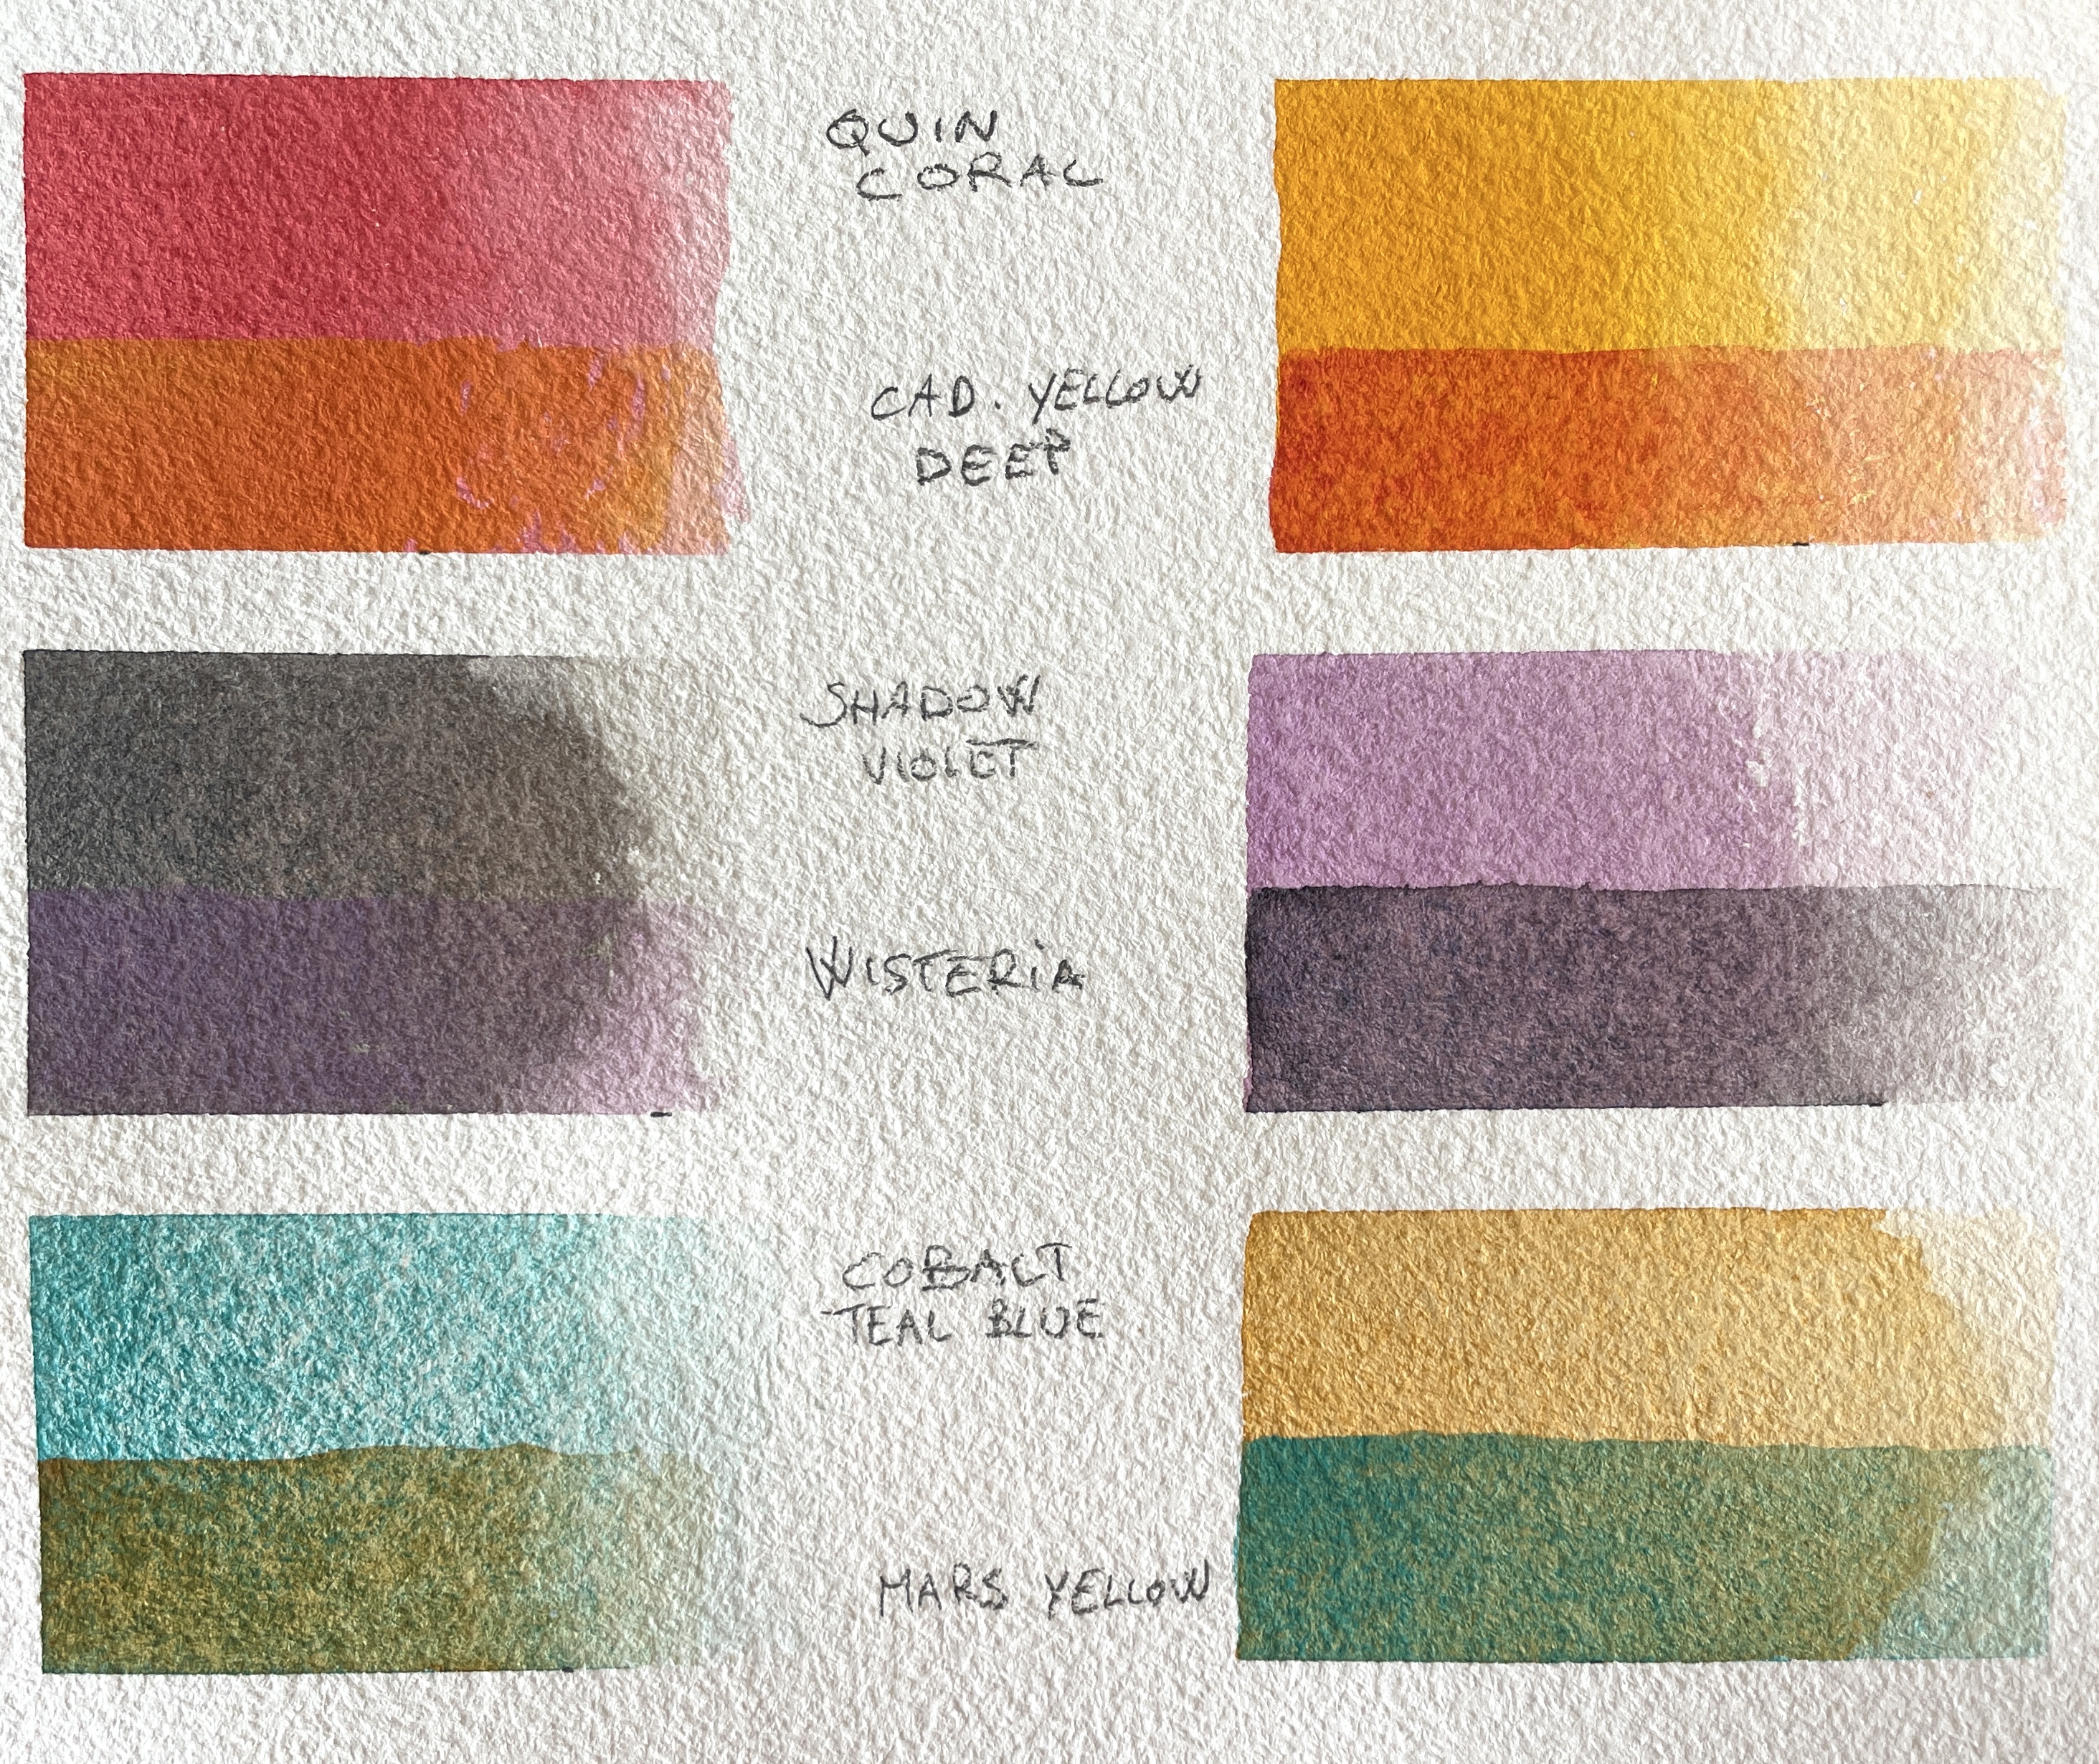
I love working with DANIEL SMITH Watercolors because of their vibrancy, ease of re-wetting, and number of pigments. I was super excited when I received this selection of greys and I knew exactly which of my photos I wanted to paint to try them out. Like a lot of artists, I can get caught up using the same colors for painting after painting. So it’s exciting to try new colors. Time to experiment!

Spa Day is from a photo I took of a red crested cardinal after he’d bathed in a fountain. The photo intrigued me because of all the neutral colors around the bright pop of red-orange on the bird’s head. I decided to experiment with this painting and not only did I try all the greys, but I also tried a different brand of paper and a technique I don’t usually use – blooms. I began by using my photo software to adjust the composition by moving the bird to the right and added some more water dripping in the fountain. I don’t normally paint with so many varieties of one color (in this case, grey), but I decided to throw caution to the wind because I was experimenting. Here’s my full palette for this work:
- Alvaro’s Caliente Grey
- Alvaro’s Fresco Grey
- Joseph Z’s Warm Grey
- Joseph Z’s Cool Grey
- Joseph Z’s Neutral Grey
- Gray Titanium
- Bronzite Genuine
- Mummy Bauxite
- Green Apatite Genuine
- Sodalite Genuine
- Pyrrol Scarlet
- Carmine
- Quinacridone Rose
- Quinacridone Gold
- Quinacridone Sienna
- Ultramarine Blue
- Cerulean Blue, Chromium
- Burnt Umber

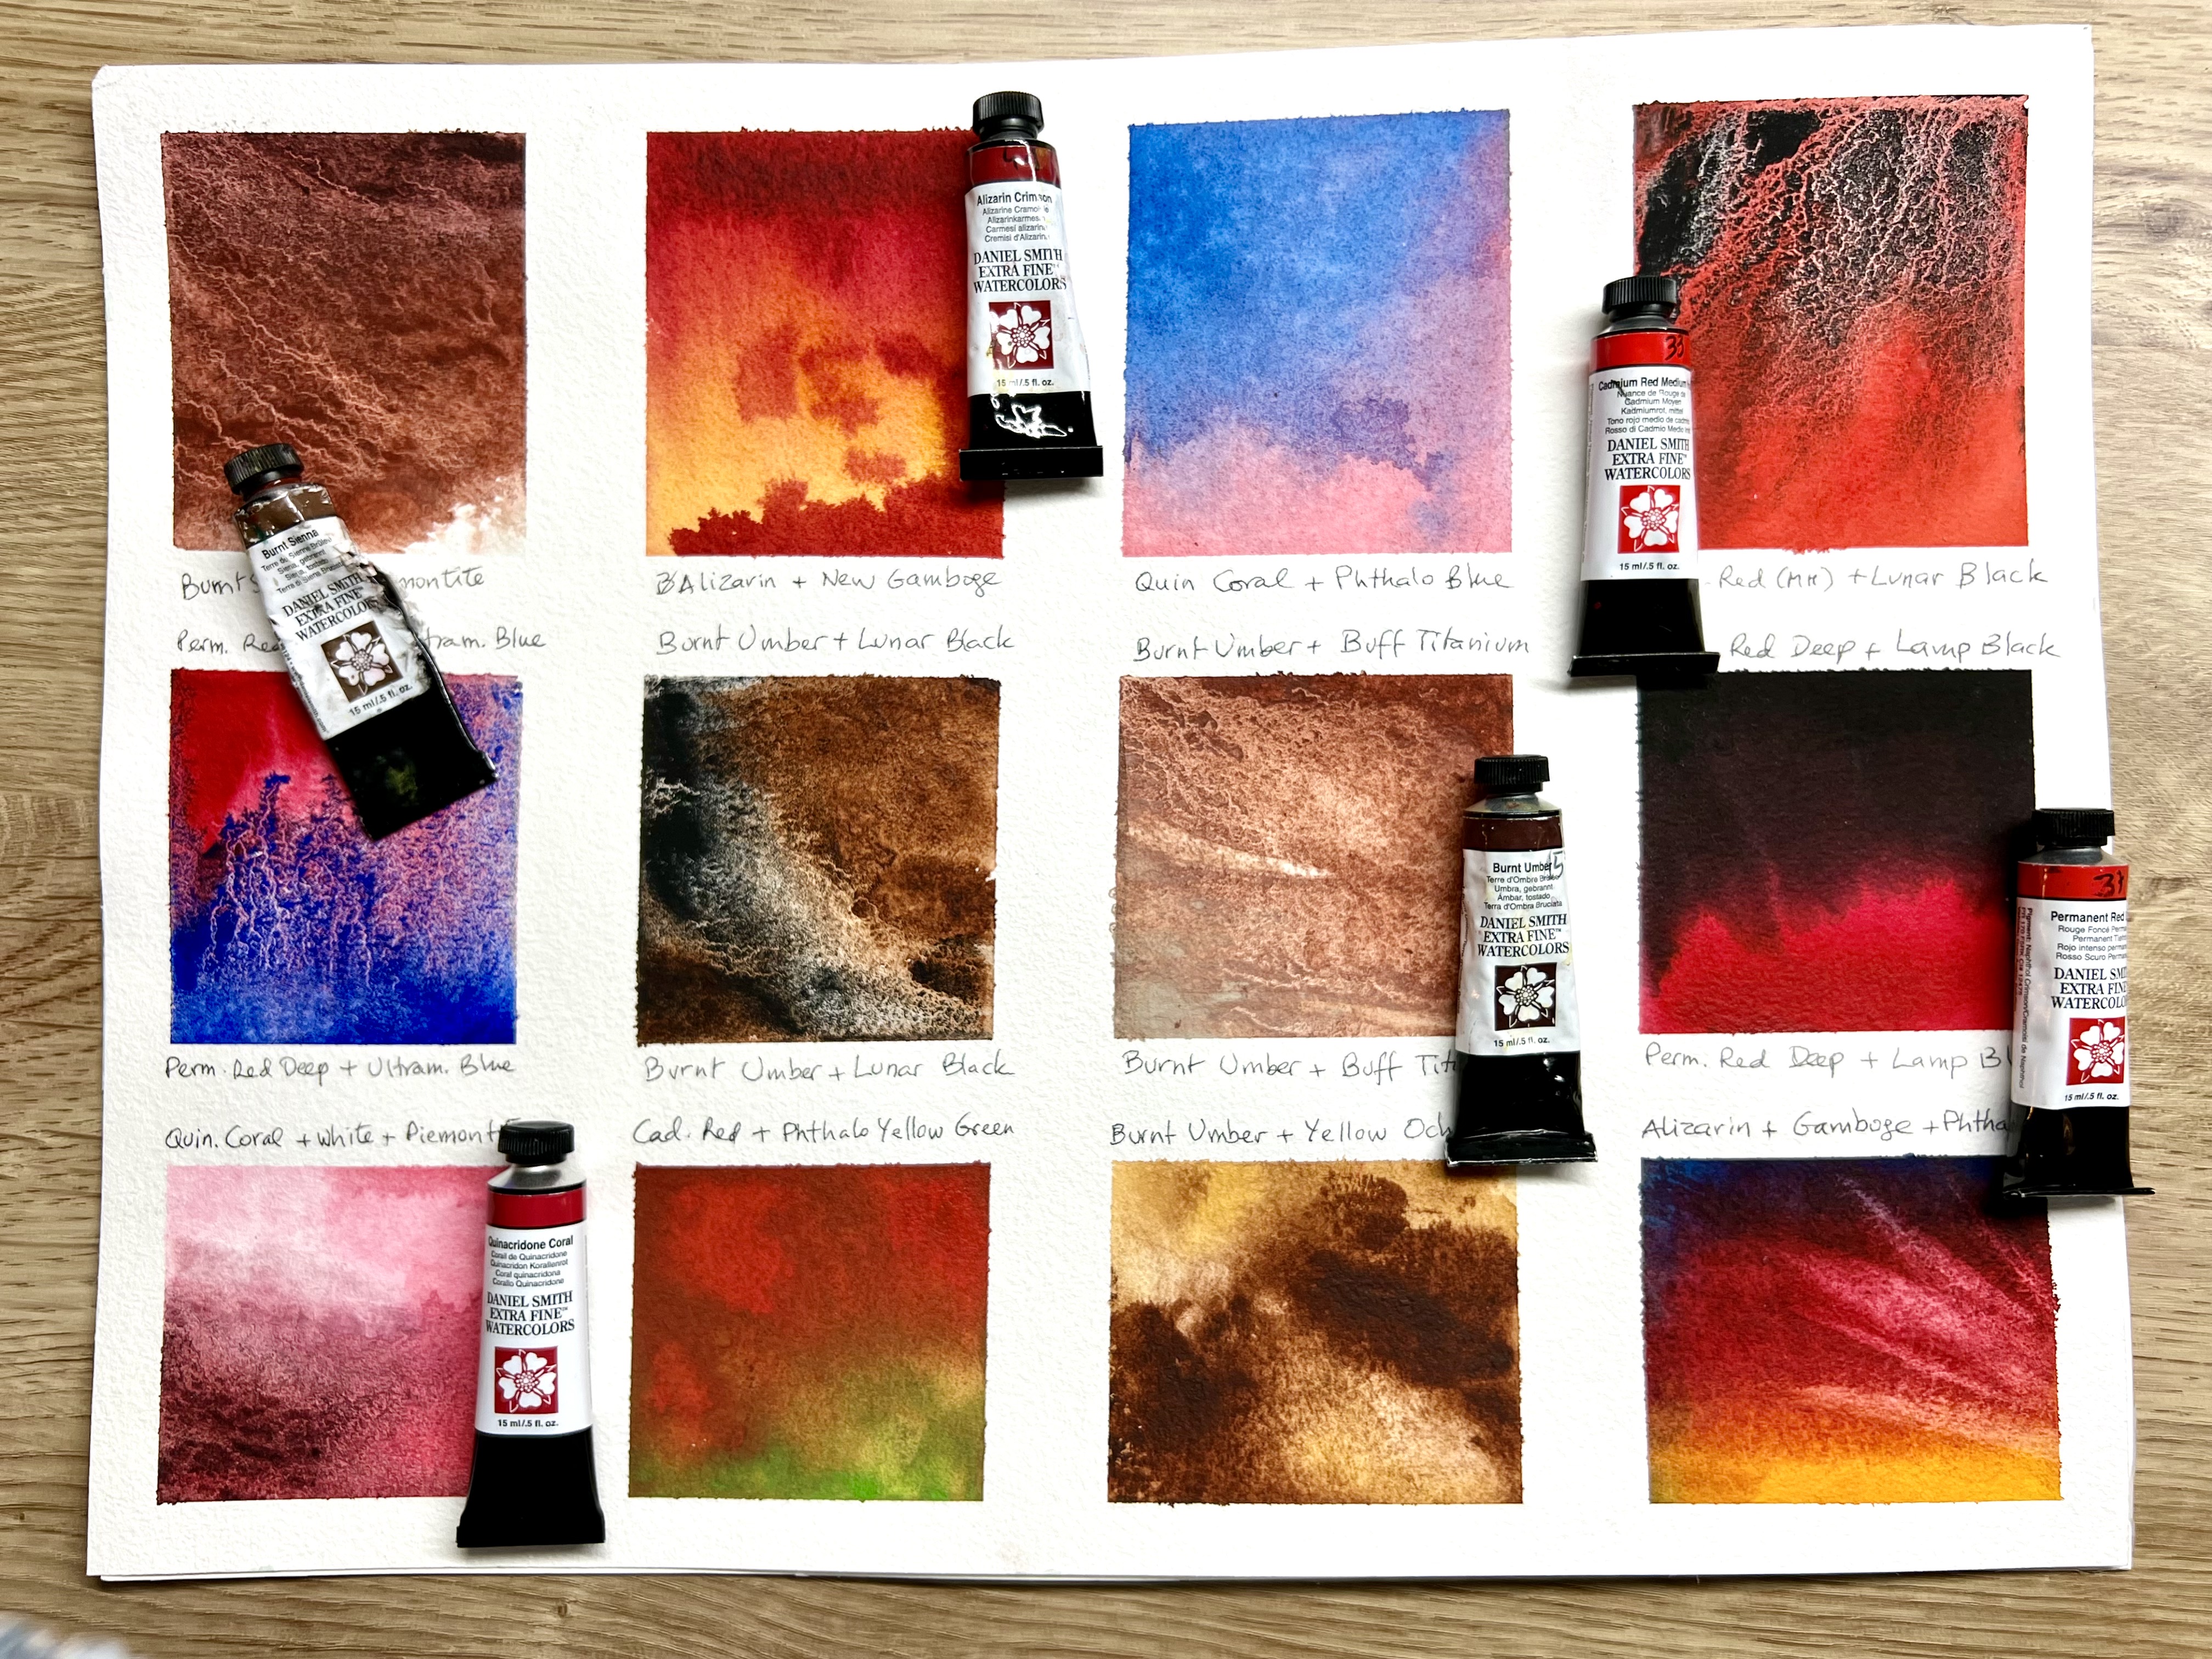
Step 1: I start all of my paintings by doing a detailed drawing from my photo. I then enlarge the drawing and transfer it to my watercolor paper using my light table. I stretched my watercolor paper onto foam board and while it was drying overnight, I played with the greys and did a small color study to get an idea of my techniques for the background.

Step 2: Next, I masked out the bird and dripping water with masking tape. I used masking fluid to mask some of the small drops of water on the bird’s feathers and in the background, as well as the highlights on the bird’s eye. I began the fountain by wetting the area and used a variety of the greys from Alvaro’s Fresco Grey and a little Gray Titanium on the left, to Joseph Z’s Cool and Warm Greys as I moved to the right. While these areas were wet, I flicked on water for blooms and charged in Bronzite Genuine and Mummy Bauxite for color variety and texture. As the area started to dry, I flicked on more of the Bronzite Genuine, Mummy Bauxite, and Alvaro’s Caliente Grey to make the fountain feel like rough stone.

Step 3: I used Alvaro’s Fresco Grey in the background on the left and under the bird on the ledge. I really like this cool/purple grey and I’m already using it on another painting. I glazed some of the Bronzite Genuine over parts of this area to give the gray fountain some patina. Bronzite Genuine is naturally shiny so this pigment is fun to see up close because it sparkles. I used Joseph Z’s Warm Grey and a touch of Alvaro’s Caliente Grey to create the dark shadow on the fountain behind the bird. Then I removed the masking on one of the lines of dripping water to see if my values were working. This helps me decide if I need to add more glazes before removing all the masking.

Step 4: I continued working around all the greys of the background and used some of Joseph Z’s Warm Grey for the shadow on the back left. I repeated the greys from the walls of the fountain in the water along with some Green Apatite Genuine and Quinacridone Gold. I debated whether to include the green in the water, but I liked the contrast with the red of the birds head. The green also appears along the front edge of the ledge the bird rests on. I finished up the majority of the background and shadows and then removed the masking fluid on the bird and dripping water.

Step 5: I was excited to start the birds head and I began with Quinacridone Sienna for the lighter, muted orange feathers. After this dried, I added a mix of Pyrrol Scarlet and Carmine for the red feathers. Then to give the bird life, I painted his eye with a mix of Burnt Umber and Sodalite Genuine. I left the highlight at the bottom of the eye and later painted some Quinacridone Sienna on that area. After removing the mask for the brightest highlight, I added a touch of Cerulean Blue, Chromium to reflect the sky in the bird’s eye. The beak was painted with glazes on dry paper using Burnt Umber, Quinacridone Rose, and Cerulean Blue, Chromium.

Step 6: I decided to use Ultramarine Blue and Burnt Umber, a gray mix that I know well for the bird’s feathers. This mix allows me to vary the gray from cool to warm and keep a unified look to the feathers. I started adding glazes to the bird’s head for shadows and depth and mixed Cerulean Blue, Chromium and Quinacridone Rose for the shadow on the white body feathers. I softened the edges of some of the feathers by applying water while an area was wet or softened the edge after it had dried.
Occasionally I took a break from the feathers and worked on the dripping water in the background. I wet each drip and then painted it using Alvaro’s Caliente and Fresco Greys. I left some of the edges and circles within the drips white to make them sparkle.

Step 7: After adding many layers to the bird’s feathers, I removed the masking fluid from the water drops all around the background. I softened their edges using a small flat brush and water. Then I added some color to some in the shadows. For those that were floating on the water, I added a line to the middle and shaded the reflection in the water.

Step 8: At this point, I took some time to look at details in the almost finished painting. I decided that I wanted to lift some of the color in the water to create some larger white splashes. I used masking tape and a sharp blade to cut out some shapes. I was pleased with how well the Signature Series Greys lifted. After removing the tape, I cleaned up the shapes I created to integrate them into the surrounding water.

Normally, I would not recommend using so many different grays in the same painting. In this case, the variety of grays seemed to work together for the colors and textures of the fountain. I feel like this experimental painting was a personal success on multiple fronts. The different cold press paper that I tried worked well and gives me an option from my usual CP paper. I enjoyed experimenting with the textures of the fountain and the Primatek Watercolors, and the greys really added to that effect with their granulation (Alvaro’s Caliente Grey is the only non-granulating gray in the bunch). It was a pleasure trying out most of these grays – my favorites are Alvaro’s Caliente and Fresco Greys, with Joseph Z’s Warm and Cool Greys as close runners-up. These will be added to my arsenal of convenience colors for future paintings.