Share:
The stages of the demonstration here are not my standard approach for every painting. Mostly there are no stages. Being impatient, I work continuously on areas of paper where I find appropriate wetness. I like it when viewers identify with the subject, the atmosphere, the location, noise, smell and the textures rather than wondering how I have achieved this effect or that. I don’t stick to any particular style. I let the subject decide the style. I try something different in almost every painting to the point that I feel uncomfortable when 3 or 4 paintings come out good in a row. I have tried to master the accidents in watercolor in a structured manner, but I gave up. I just let them happen.
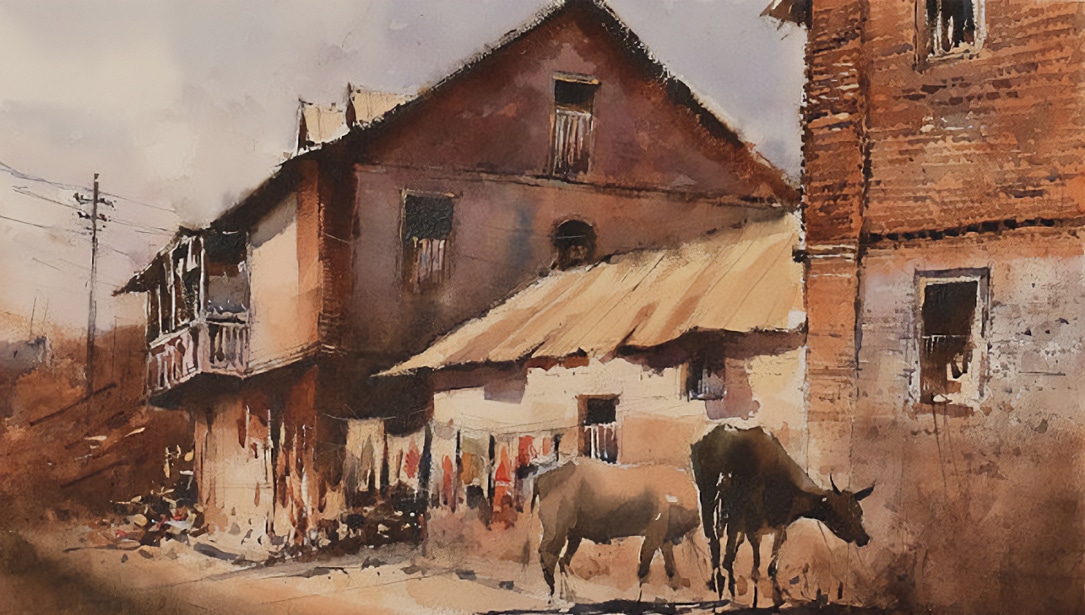
The subject of my painting is a locality in the city of Pune close to Mumbai which lies in western India. This is a traditional milkmen’s colony established more than a 100 years ago in Colonial days to supply milk to the military barracks nearby. It was a hot summer day in the month of May. I was riding my motorbike and noticed the scene as I sped by. Instantaneously my eyes made a note to come back. I liked the typical Indian forms within the clutter, the sharp shadows, the blinding sunlit areas and a wonderful story that lay in the location.
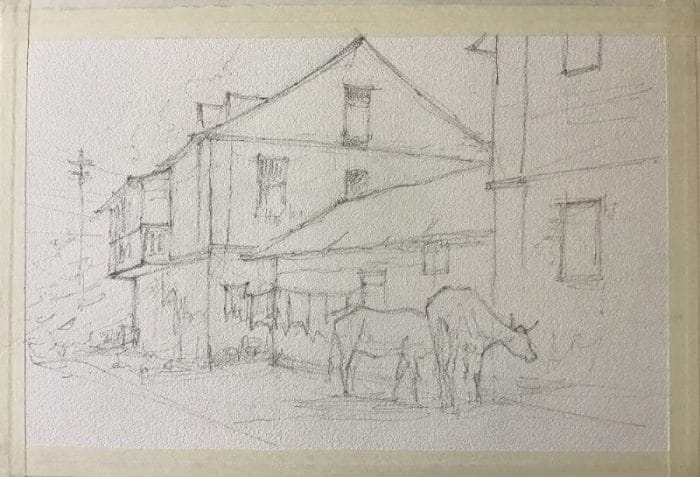
Step 1 – The sketch
Usually my sketches don’t have so much definition, but I thought this was a complex subject. For a complex subject, a sketch needs to be pretty accurate in terms of perspective, proportions and respective positions of various elements. My painting sketch is usually a blend of several pencil sketches, photo references and a few failed attempts with the same subject. I take artistic freedom to move things around, eliminate or add a few things, but I never change anything to harm the basic atmosphere of the subject. The location is only incidental, atmosphere is the subject. I like to leave a few things partially out of frame to force the viewer’s imagination beyond the border of the painting. I would be lying if I said I sorted out all potential little issues in my mind. But I am confident that I can cross those bridges when they arrive. Without those potential issues, there is no fun. Painting is not like a mundane daily drive to the office. Watercolor artists need the confidence of a rally car driver. More often than not, it is a disaster.
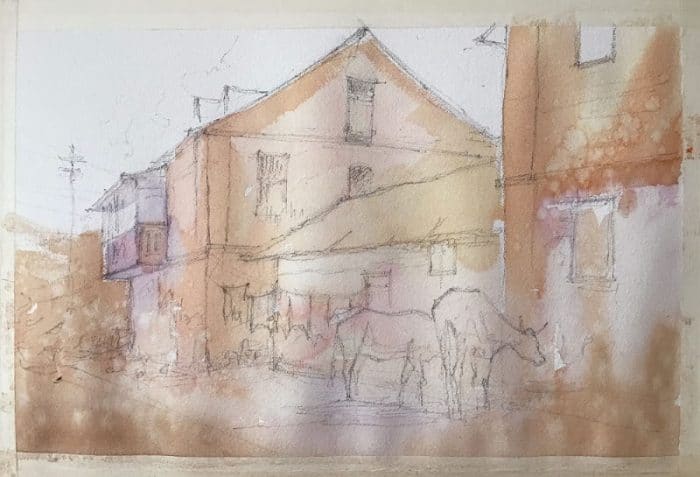
Step 2 – Light tones
In this stage, I covered areas with light tones with just a hint of cool and warm areas. Borders are not very important at this stage. Arrangement of shapes and their interrelations are more important and need more attention. The shapes need to be across the elements, otherwise I am worried the painting will start looking like a collage of different colored shapes stuck on a piece of paper. I let this stage dry. This stage also takes care of setting the tonal reference. Judging tones looking at a blank white paper is difficult. I would say, this stage is the proverbial jump in the water knowing very well it is cold.
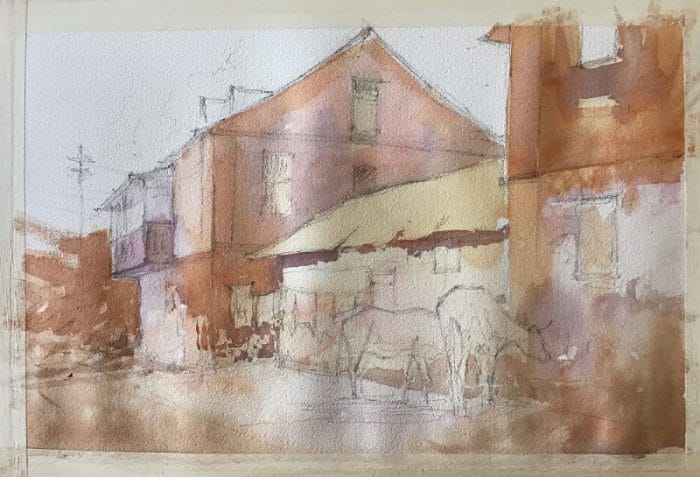
Step 3 – Establishing major shapes
Next I work on the middle tones. This is the stage at which I usually start to get an inkling if the painting is working or there is struggle ahead. And believe me, that feeling can be terribly wrong on both sides. But I cannot stop getting that feeling. I hold back on going dark. Here I find it very useful to creatively work on moist or wet surface using techniques like loading, mixing paint on paper, spraying water on the paper, lifting to create glow, etc. The combination of steps 2 and 3 is the most visible part of the finished painting. Extreme care is required here to ensure that large surfaces don’t go dead. Surfaces don’t go dead when they are wet, but they can suddenly start looking dead when they are dry…and then it is over. So good judgement is required here. I didn’t let the surface dry till I was sure. Mixing colors on paper works especially wonderfully in middle tones to reduce the possibility of surfaces going dead. Important edges which I had decided to keep sharp got defined here. I decide to keep the middle tones a bit lighter than final, because sometimes I like to integrate the painting with washes after the darks are established.

Step 4 – Establishing the darks and the edges
I carefully choose where I need to dry brush and where I need to work on wet surfaces. Overdoing anything can make the painting look tacky and contrived. I like to paint solid dark areas on a slightly moist surface. That leaves nice soft edges and I can also load the surface with cooler or warmer tones within the dark to make the solid darks more interesting. Sometimes I just drop water at the edges after I have painted darks. This creates a wonderful glowing edge. The whole idea is to avoid making solid darks looking too neat or dead. There should be some areas where the light washes, the middle tones and the darks interact with each other and create a vibration. As an example, look at the clothing hanging on the wire and the corner of the building against the sunlit wall and roof – these areas have that vibration. This stage is almost irreversible. Careful attention is necessary to establish places which I want to pop out. I tried as much as possible to either implicitly or explicitly connect the darks.
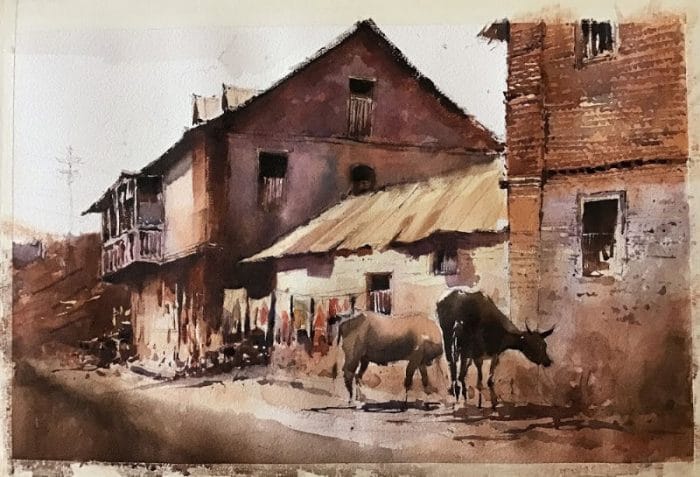
Step 5 – Detailing
I did the cows carefully, avoiding too much detailing. I didn’t want the viewer to look at the painting and say, “look at the wonderful cows!” I applied over-washes, mostly to various shadow areas to integrate them into a homogeneous painting. I did this with a synthetic hair flat brush using a light hand. This over-wash creates some very interesting subtle edges on bright areas and also softens the edges of solid darks in the shadows. I was careful not to touch the bright areas too much. Like the darks, it is also a good idea to keep the sunlit areas connected. I did some flat brush detailing on the roof, and some brickwork by dirtying the edges of the wall close to the ground. Adding some detailing on the edges of shadows with a dry brush followed. I darkened small specific areas to allow things to pop out like shadows around the clothes, and the window behind the cow. To integrate the cows into the painting, I applied a connecting pattern behind the cows on the background wall.

Step 6 – Final details
I find this to be a critical stage, but it’s also a very satisfying stage, if I am happy with the effort until now. It is very easy to overwork and diffuse the focal point. It is also very easy to underwork and make the painting look unfinished and ordinary. I added the sky. I used a rigger brush to add lines in some places to accentuate the perspective and draw the attention of the viewer towards a desired area. I sparingly used Titanium White and Naples Yellow to add sparkle to areas on the border of light and shadow. I added poles and some vertical elements to add to the drama. Then I sprinkled pure water and sprayed color using an oil painting brush avoiding overdoing it. And that’s it!
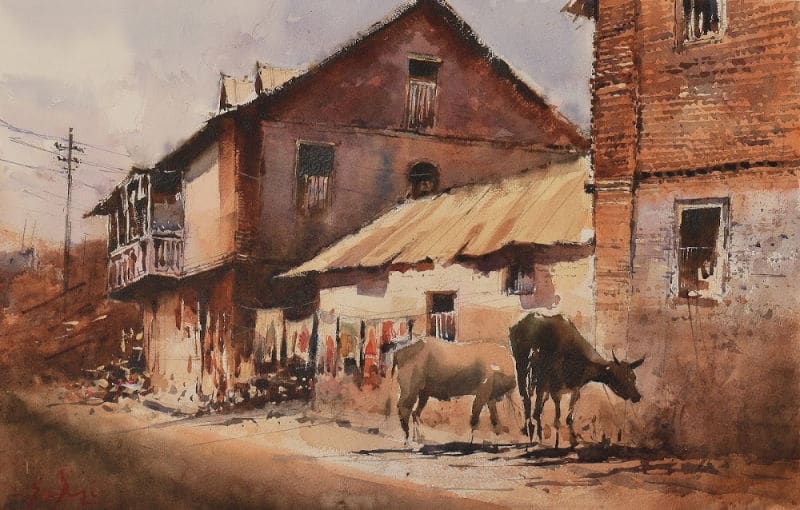
Lazy Afternoon in Indian Summer by Sanjay Desai
That’s not quite it. I went away from the painting for a few minutes, came back, sat down and looked at it. May be the background of the building at the back could have been better. Does the painting have too much contrast? The location had lots of contrast. It was summer. Shadows are sharp and dark in India. But still…. could I have made painting yellow rather than red? Could I have lowered the horizon and stretched the perspective to make the buildings and the cows more imposing? Maybe…the only way to find out is to try all these things another day.

Sanjay Desai painting in his studio.

